

Prerequisites
- Integrate.io account with permissions to create connections, pipelines, and API keys
- Salesforce user with API access (a dedicated Integration User is recommended)
- SFTP server reachable from Integrate.io egress IPs, with SSH public key authentication (recommended) and optional PGP public key for file encryption
- Optional: Secrets vault/manager for credential rotation
Creating Secure Connections
Salesforce Connection
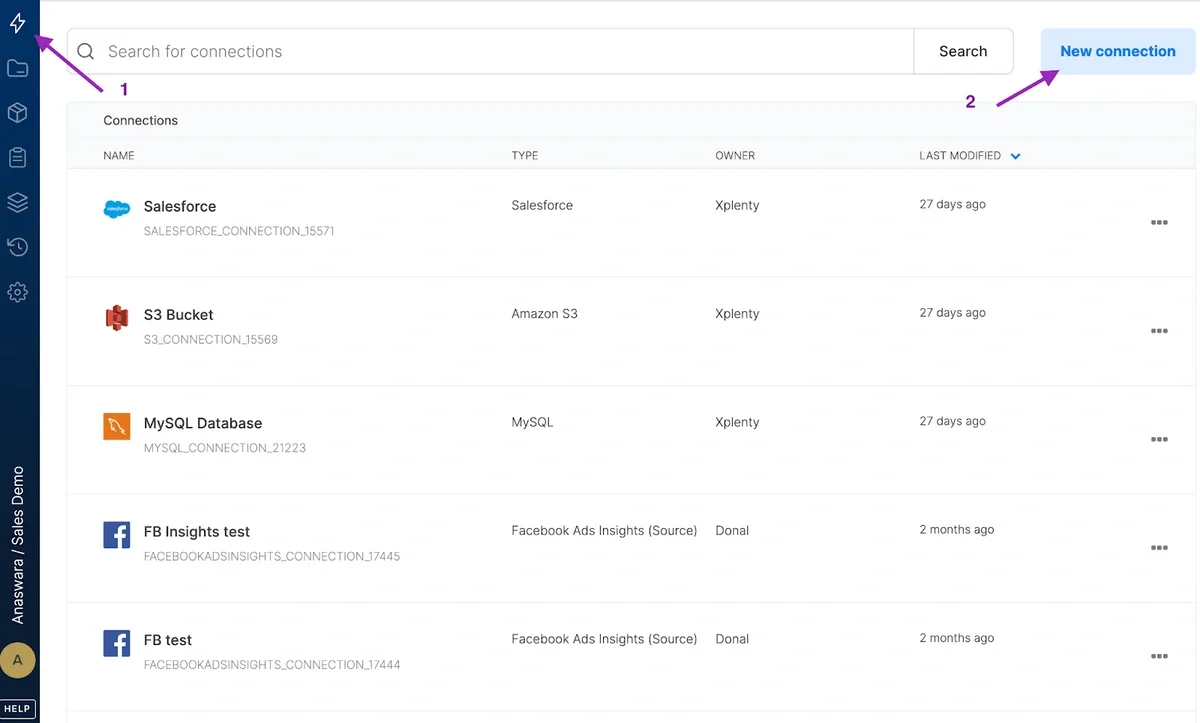
1
Click the Connections icon (lightning bolt) on the top-left menu.
2
Click “New Connection,” then choose “Salesforce”.
3
Select the Salesforce environment (production or sandbox) and click authorize.
4
Sign in with your Salesforce account in the login window.
For sandbox users: append a dot and sandbox name to your username. Example: danielle@ilovemycompany.com.test
5
Click Allow to grant Integrate.io ETL access to Salesforce.
6
Name the connection and click Create Salesforce Connection.
SFTP Connection
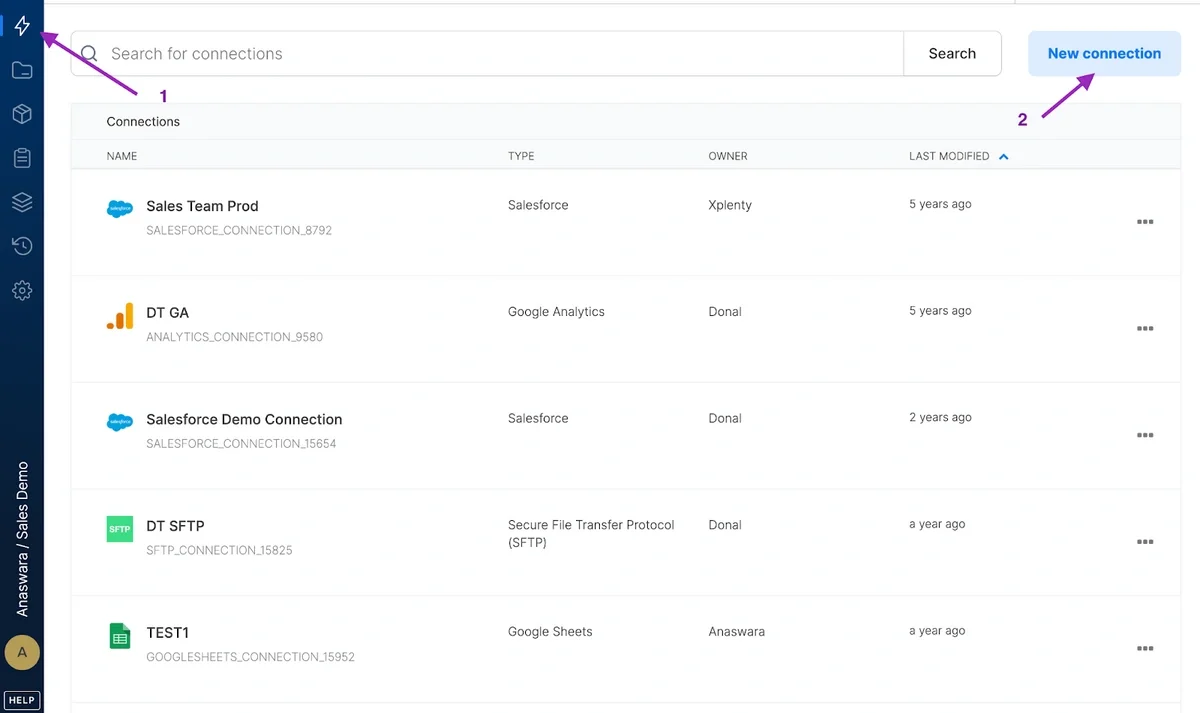
1
Click the Connections icon (lightning bolt) on the top-left menu.
2
Click New connection and choose Secure File Transfer Protocol (SFTP).
3
In the SFTP connection window, enter:
- Access type: Direct connection, SSH tunnel, or reverse SSH tunnel
- Hostname: The SFTP server hostname
- Authentication Method: Password or public key
- User Name: SFTP server username
- Password: Connection password (cannot contain @)
- Port: TCP port of the SFTP server
4
Click Test connection to verify credentials.
5
Click Create SFTP connection.